Every Order Desk store starts with a few default folders:
- New
- Prepared
- Closed
- Canceled
- All Orders
When a new order is imported, it will be added to the New folder by default, however this can be changed with rules or certain integration settings.
To grasp the concept of folders, try thinking of them in the physical sense: if you received a paper order, you’d put it into the New folder. When that order is packed but not yet shipped, you’d remove the paper from the New folder and place it into the Prepared folder and so on.
It’s worth mentioning that when an order moves between folders, its status won’t automatically update across any integrations by default, but this is an option that you can configure. You’ll need to check the settings pages in your installed integrations or use the Rule Builder to tell Order Desk to update an order’s status when it’s moved between folders.
How to Use Folders
For a visual walkthrough of how folders work in Order Desk, check out the following video:
Create Folder
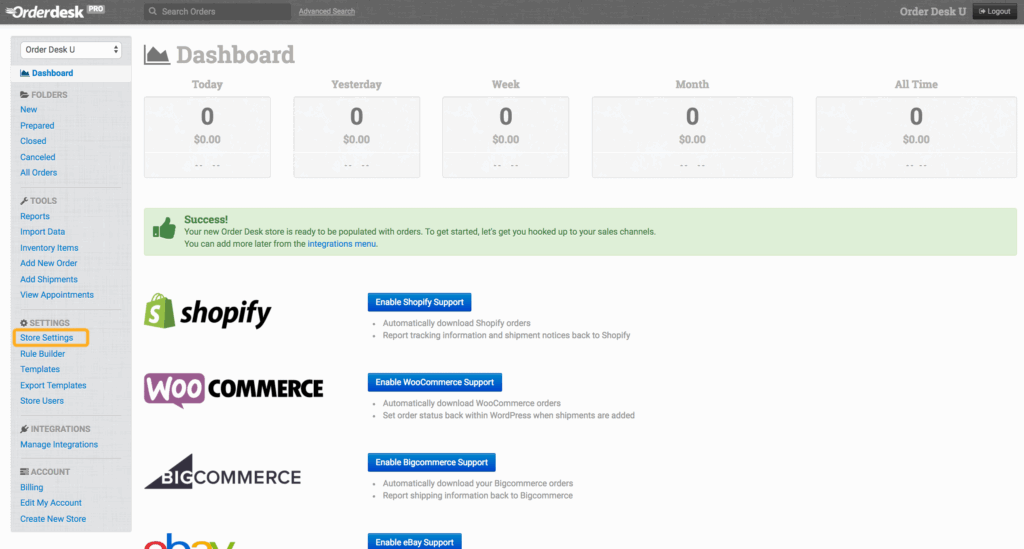
If you’d like to create a new folder, look under the Settings menu in the left sidebar and click on Store Settings:
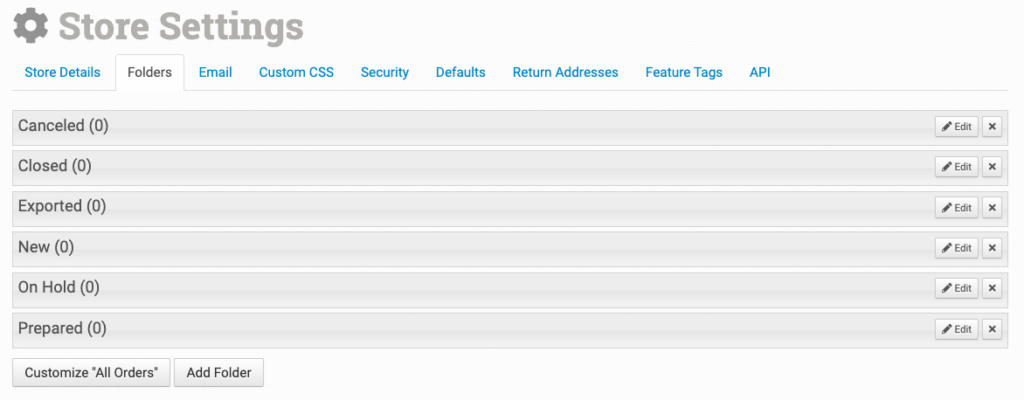
On the Store Settings page, click on the Folders tab, then on Add Folder:
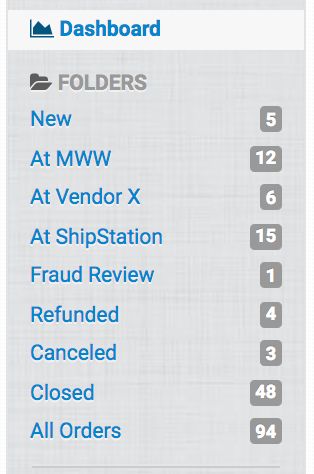
A good method for setting up your folders is to think of where an order physically exists during the fulfillment process. For example, if you send orders to more than one vendor, or a different fulfillment or shipping integration, you can move orders into folders that say they’ve been sent but have not yet been fulfilled, such as “At Vendor X” or “At MWW” or “At ShipStation”.
Moving Orders Through Folders
Remember, orders won’t move on their own unless your settings tell them to move somewhere.
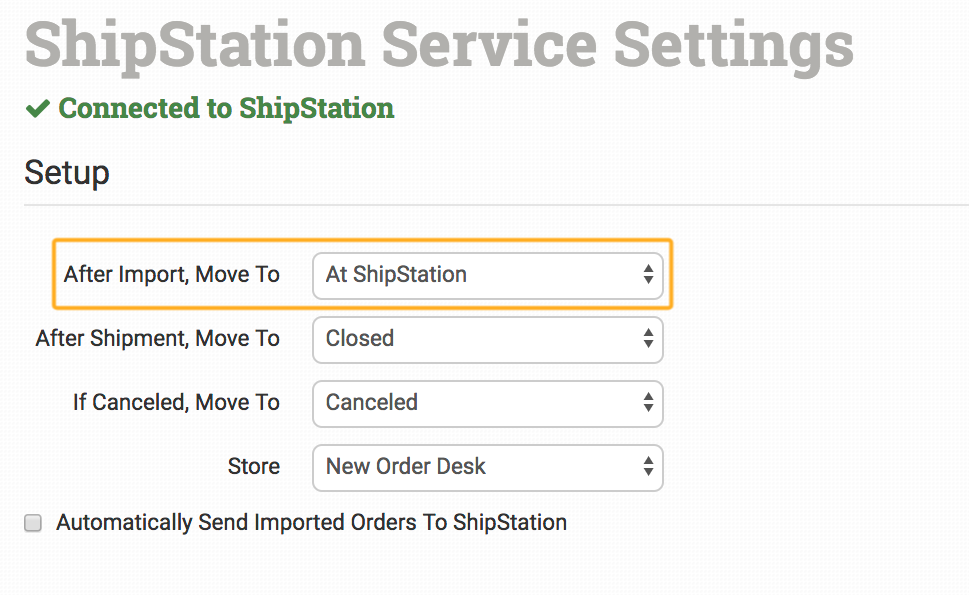
Many integration include a setting that tells where to put an order after it’s imported or submitted for fulfillment. Here’s an example of what that might look like:
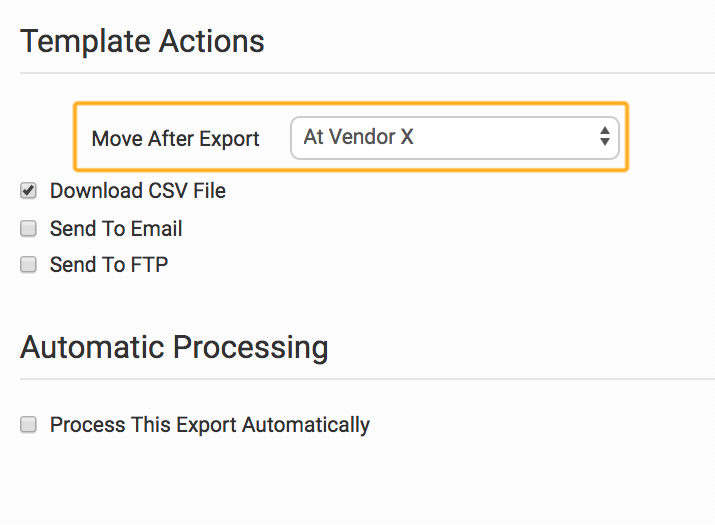
If sending to a third party vendor through an export template, you can tell the export template to place the order into a specific folder after it’s exported:
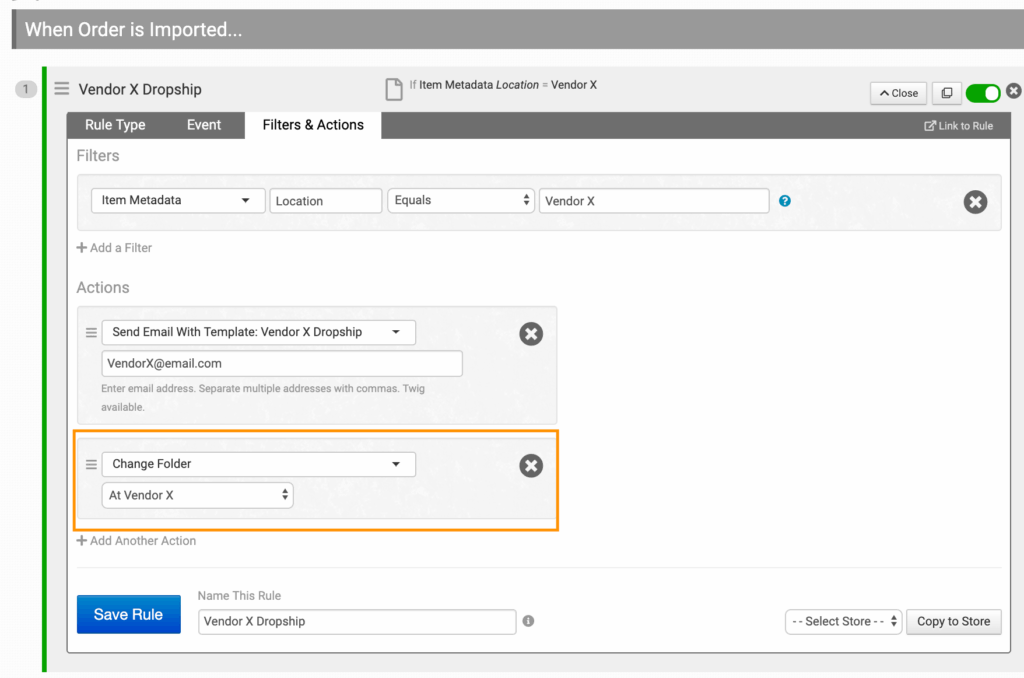
If your business sends dropshipping emails to a third party vendor, you can even add an action in your rules to move the order into a specific folder after the email is sent:
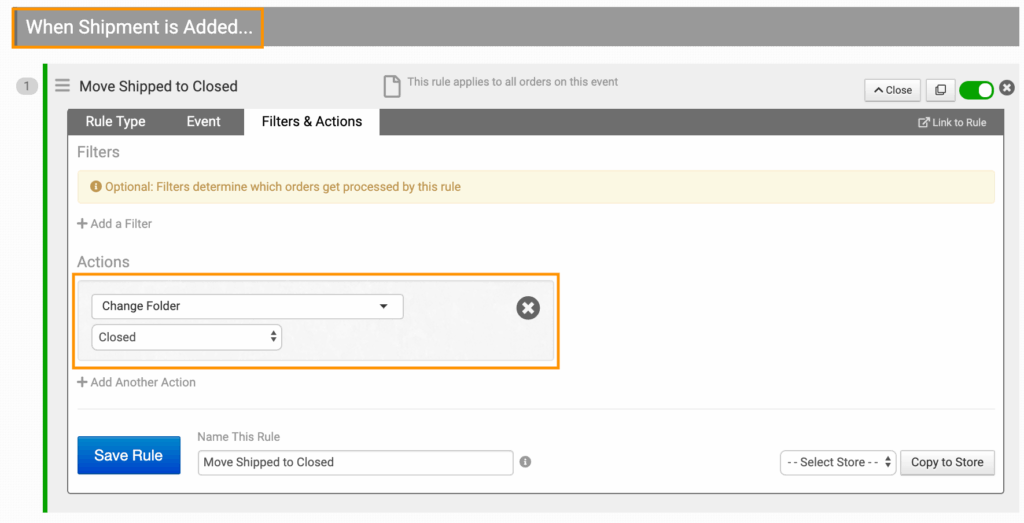
If using an integration, check to see if you can change the folder when a shipment is added. If that isn’t an option, or if you aren’t using an integration for some orders, you can set up a rule to move orders to the closed folder when a shipment is added to an order:
Another option with custom folders is filtering orders, whether to flag them for review, assign them to a specific person on your team, or send them to a hold folder that sets them aside before they are ready to move to the next stage in the fulfillment process.
Once you create the folders you need, you can adjust them as you become more familiar with Order Desk and decide how you want to use the app to best process and fulfill each of your orders.