Order Desk has the ability to export an XML file that easily imports into Stamps.com so you can send your orders to USPS to create labels. This integration is compatible with Windows computers. If you use a Mac, we recommend using Endicia instead.
Integration Setup
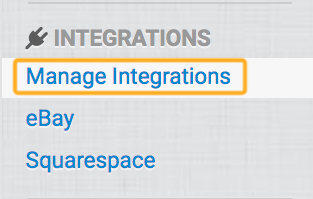
To enable the Stamps.com integration, click on Manage Integrations under the Integrations menu in the left sidebar:
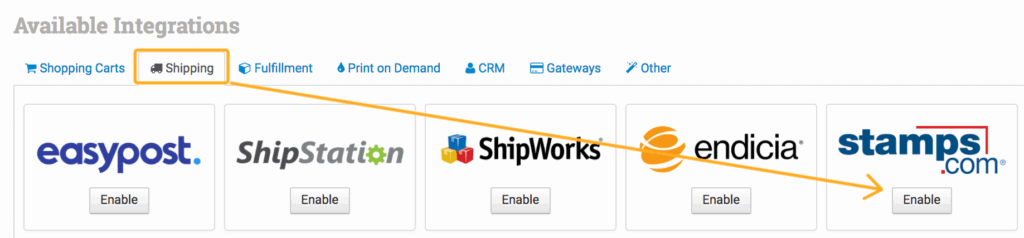
Under the Shipping Tab, find Stamps.com and click Enable:
Because Stamps.com isn’t an integration that connects directly to Order Desk, you won’t need to include any account credentials. Once you have enabled the integration, you’ll see some integration settings and details:
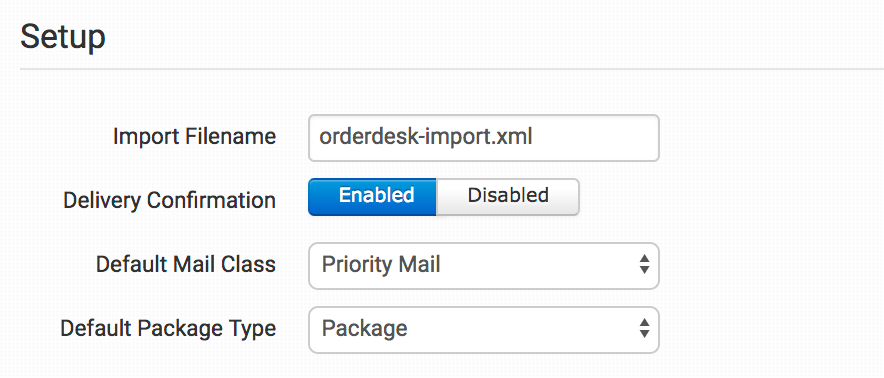
Select your preferences to finish setting up the integration in Order Desk, and then read the next section for how to set up your Stamps.com account to accept Order Desk orders.
Exporting Orders to Stamps.com
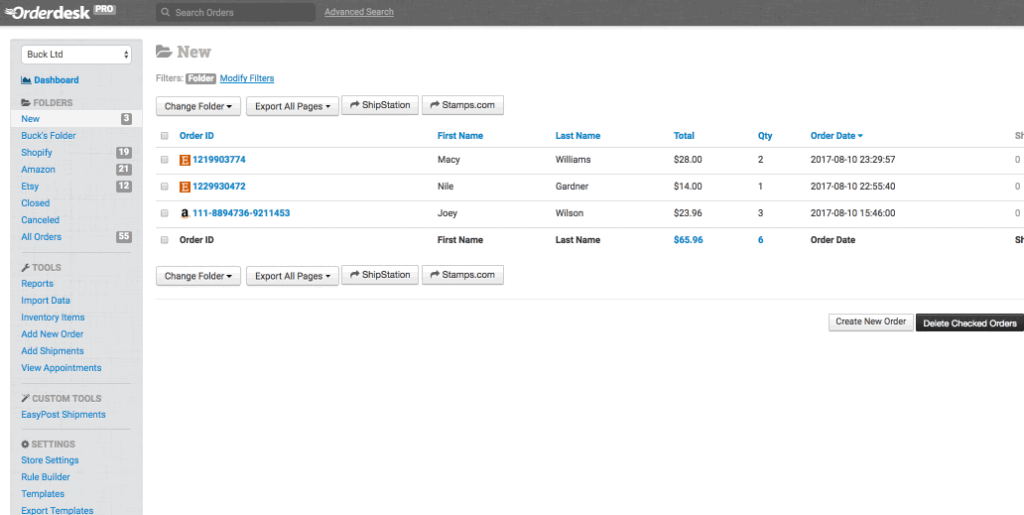
To set up your Stamps.com profile, you will need to export at least one order into an XML file. To do this, select the orders you want to export and click on the sendto Stamps.com button:
This will download the XML file to your computer. You can leave the file in the location it downloads to or use a specific folder where you will move all of your XML files. In this example, we are moving the file from the download folder to a folder called Stamps.com. It won’t matter which folder you use, as long as you consistently add all future XML exports from Order Desk to the same folder, as this is where Stamps.com will know to look for your files.
Next, go into the Stamps.com app ( download it to your Windows computer if you haven’t already).
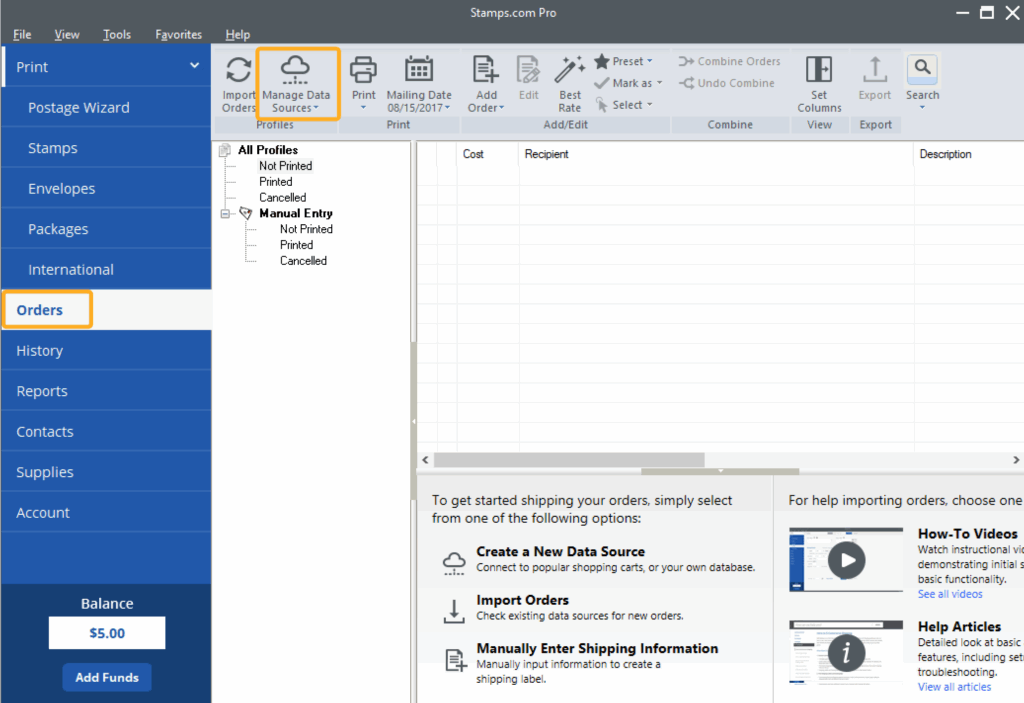
Click on Orders then Manage Data Source and select Add Source from the dropdown:
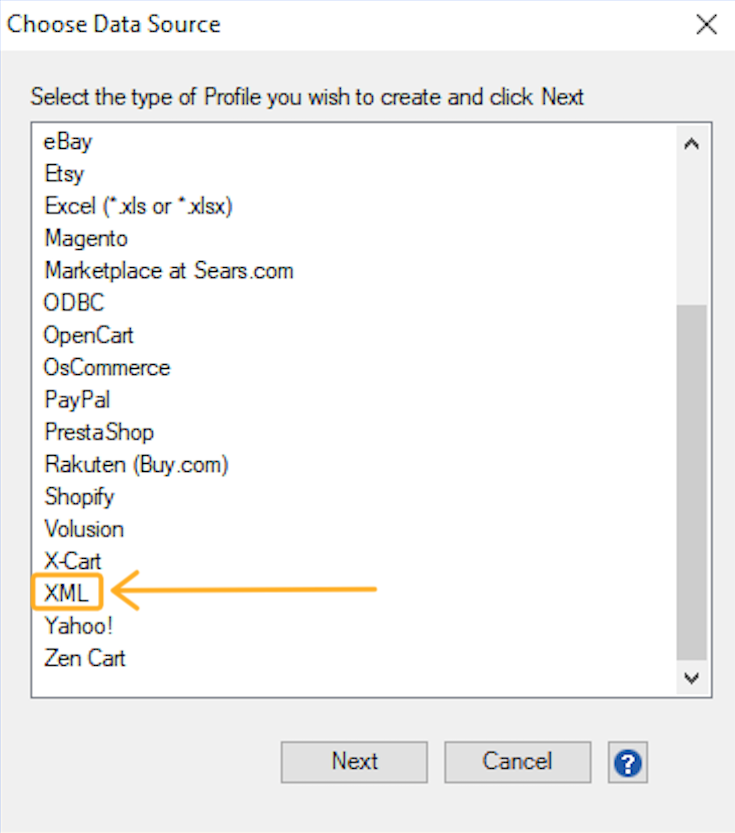
Select XML and click Next:
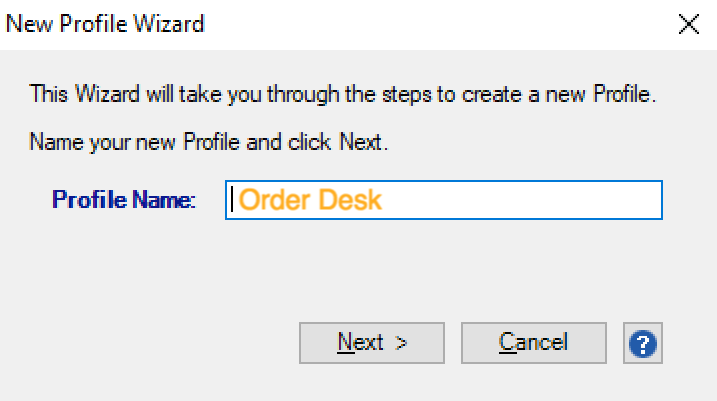
Type “Order Desk” for your Profile Name and click Next:
Now you can browse for and select the XML file you saved to your computer and then click Next:

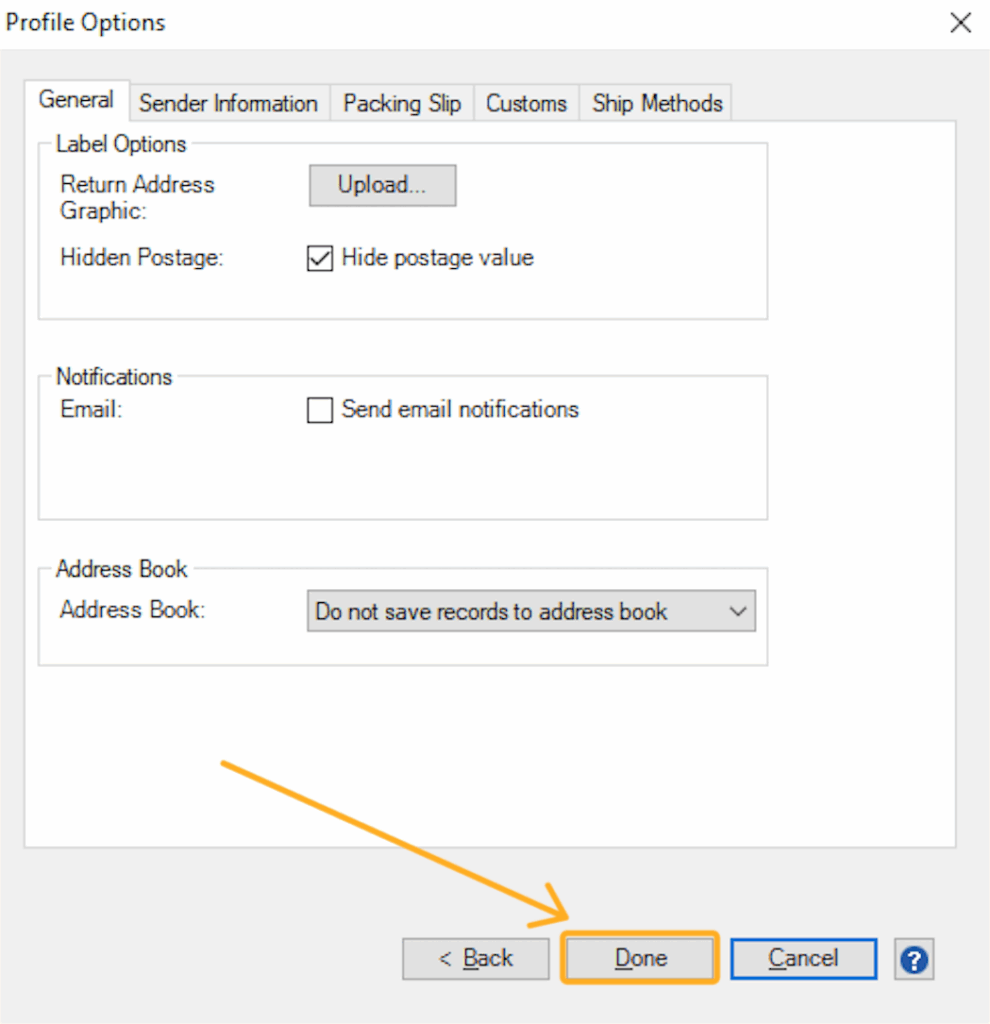
Review the settings and click Done.
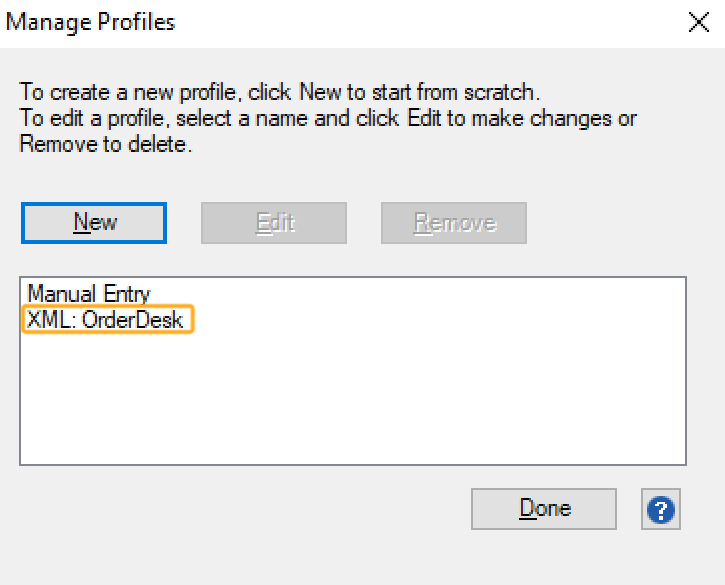
On the next dialog box, choose XML: OrderDesk as your profile and click Done:
Once setup, you can export your orders the same way: select the orders to export and click the send to Stamps.com button in Order Desk. Make sure the file is always in the same folder/location from when you initially set up the integration.
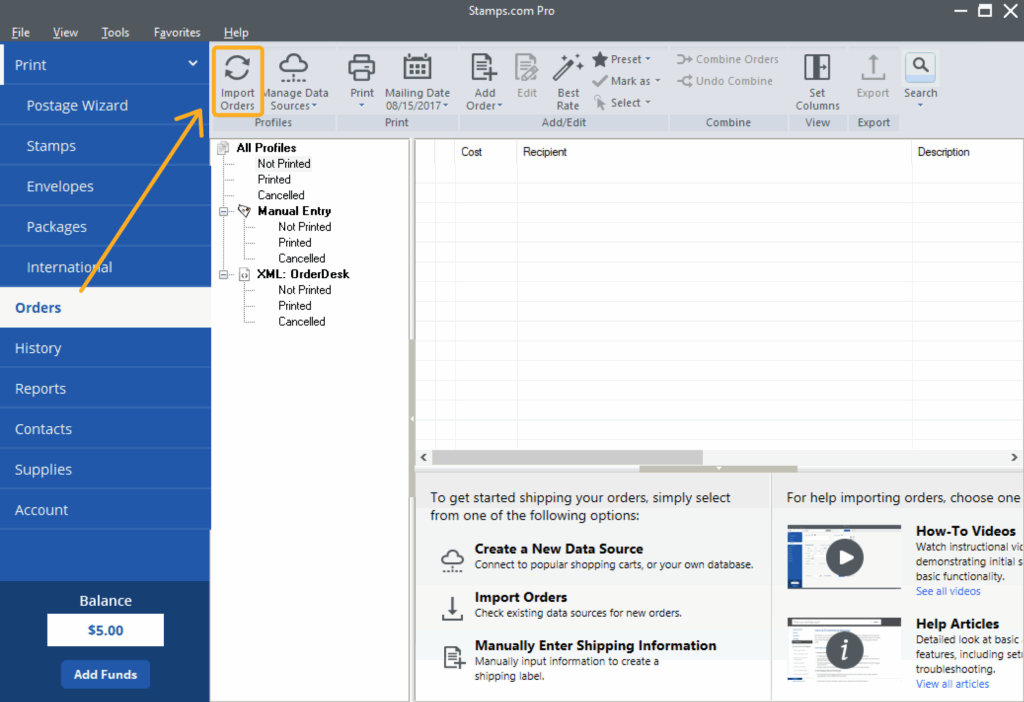
Go into your Stamps.com app and click on Import Orders to import the file:
Shipping Class Match

For information on how to use the Shipping Class Match section at the bottom of the Stamps.com integration settings page, please read through our Shipping Class Match guide.
Special Features
The following fields can be set as checkout data or order metadata when submitting to Stamps.com.
| Field Name | Field Value |
| PackageType | Sets the type of package. |
| PackageHeight | Sets the total height of the package. |
| PackageLength | Sets the total length of the package. |
| PackageWidth | Sets the total width of the package. |
| PackageWeight | Sets the total weight of the package. |
If you are unfamiliar with checkout data, see the How to Work with Checkout Data guide.